- Basics
- Getting started with LimeLM
- Types of software licensing
- What are Activations & Deactivations?
- How hardware-locked licensing and online activation works
- How to switch your licensing to LimeLM, TurboActivate, and TurboFloat
- Frequently asked questions (FAQ)
- Adding users to manage your LimeLM account
- Custom license fields
- Extra activation data
- Using TurboActivate
- Timed trials in your app
- Basics for TurboFloat (floating licenses)
- TurboFloat Server
- Using TurboFloat
- Advanced
- Account security
- Offline activation
- How to generate product keys after an order
- SaaS and time-limited licensing
- Proxies in TurboActivate
- Licensing multiple products per process
- Licensing from inside a virtual machine or hypervisor
- Web API
- LimeLM web API functions
- Overview
- Encoding
- Response Formats
- REST
- JSON
- feature
- add
- delete
- edit
- getAll
- pkey
- activity
- advancedSearch
- deactivate
- delete
- find
- generate
- getDetails
- getID
- manualActivation
- manualDeactivation
- removeTag
- revoke
- setDetails
- setTags
- prod
- getAll
- create
- createVers
- changeName
- editVers
- tag
- delete
- test
- echo
- trial
- advancedSearch
- manualVerifiedTrial
- trialExtension
- delete
- generate
- getDetails
- getID
- search
Automate license generation with FastSpring
 This article will tell you how to sign up and configure FastSpring to automatically generate product keys and email them to your customers after they purchase your software.
Step 1. Signup for LimeLM, download the Web API pack
If you haven't already signed up for LimeLM then sign up now. All plans have a 30-day free trial. Or, if you're just putting your toes in the water, there's even a free plan that has no time limit and doesn't require a credit card.
After you've created your account download the LimeLM Web API pack. This zip file contains (among other things) the PHP script you'll be pasting into your FastSpring account.
Step 2: Create a product within LimeLM & add TurboActivate to your app
After you've signed up with LimeLM you'll need to create a product and add TurboActivate to your app. Read the "Getting started with LimeLM" article to learn how to do this.
Step 3. Getting your API key
Now that you've added a product within LimeLM and added TurboActivate to your app you're ready to setup your FastSpring payment form to automatically generate and send product keys to your new customers. This payment form will be using to the LimeLM API to generate product keys so you'll need to copy your LimeLM API key from your settings page.
Step 4. Getting the Version ID
You can get the version ID by examining the URL in your browser. For instance, from the URL https://wyday.com/limelm/version/100/ you can see the version ID is 100. (Note: The Version ID is not the Version GUID).
Step 5. Signup for FastSpring
If you haven't already signed up for FastSpring you can do it now.
Step 6. Configuring FastSpring
Now that you have both a LimeLM account and a FastSpring account you can set configure FastSpring to generate product keys after a customer has ordered your software.
a. Create a new product (or select an existing one)
After logging into FastSpring, click "Products" then "ADD PRODUCT" in your FastSpring dashboard:

Click the product you want to generate product keys for (or create a new product). On your product's page click the "Add Fulfillment" link.
b. License fulfillment
Click the "Generate a License" option and select the "Script (PHP or JavaScript)" at the top of the screen, select the "Script (PHP or JavaScript)" option, then click "Next".
Choose the output format as "Plain Text, Single-Line License", Set the "License Name Type" to "Email Address", and set the "Script Type" to "PHP" then click the "Create" button:

After clicking "Create" you'll be brought to a page that asks you for the PHP code to generate licenses. You can find this code after you've extracted the LimeLM Web API pack you downloaded in "Step 1" of this tutorial. Open the file "FastSpring-PHP-Code.txt" found in the "PHP\FastSpring" folder. Copy the code and paste it into the textbox on FastSpring:

In the code you just pasted change the $api_key and $version_id variables with the values of the API key (see Step 3) and the version id you'll be creating product keys for (see Step 4).
If you're setting custom license field values for the product key then you can uncomment the $feature_names and $feature_values variables add values to the arrays. For example:
//TODO: Use any custom license field values here
$feature_names = array('update_expires', 'another field name');
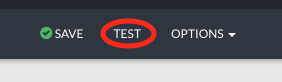
$feature_values = array('2012-06-25', 'another value');Now you're ready to test to see if everything works. Click "Save" then click "Edit" on the fulfilment that was generated and click "Test" on the page.
![]()
Note: For future changes to the fulfillment you can test without saving first. On the test screen you can set custom parameters for a transaction to test with. Or use the default values. After you have set the variables you want, click "RUN TEST"

After a few seconds FastSpring will show you the result of the test. If the license generation was successful you'll see a product key in the "Log" and "Licenses Captured" boxes:

Also, in your LimeLM dashboard you'll see the same license:

Now that the product key generates successfully click the back arrow link. This will bring you back to the script configuration page.
![]()
Click "Save" in this page to save your changes.
Not seeing the product key?
If there's no license key and you are instead seeing a blank line or an error then something went wrong. To debug the problem click the "Close" link in the "Actions" box (on the right hand side of the test page). This will bring you back to the script configuration page.
Scroll down to the bottom of the source code text box and you'll notice 2 lines that say "// Uncomment the next line [...]". Uncomment the 2 "error output" lines like this:
...
...
    else
    {
        // Uncomment the next line to see the error LimeLM is giving you.
        echo $jObj->message;
    }
}
catch (Exception $e)
{
    // Uncomment the next line to see the exception.
    echo 'Failure: '.$e->getMessage();
}
After uncommenting those 2 lines click the "Run Test" link again. Now, instead of a product key you'll see a description of the error. Fix whatever it says is wrong, comment those "error output" lines again, and run the test once more. Now the product key should appear.
Click the "Save" link to go back to your product's main configuration page.