- Getting Started
- Install wyBuild
- Video Tutorial
- Step-by-step walkthrough
- New release workflow
- Basics
- FAQ (Frequently asked questions)
- Executing files
- Registry changes
- Distribute wyUpdate
- Translate wyUpdate
- Silently Check for Updates
- Silently update Windows Services
- Requirements
- Automatic Updater
- AutomaticUpdater intro
- Tutorial for Windows Forms apps
- Tutorial for WPF apps
- Tutorial for Windows Services
- AutomaticUpdater Members
- Translate the AutomaticUpdater
- About
- Changes in 2.6.18
- Advanced
- Build from Commandline
- Encrypting updates
- Commands and Variables
- COM dll registering / unregistering
- Custom wyUpdate Version
- Download sites
- Limit or prevent updates
- Offline updates
- Override the Server Site
- Proxies in wyUpdate
- Services (start / stop)
- Signing Updates in wyBuild
- Version Numbers
- wyUpdate Commandline
New release workflow
This article covers the step-by-step process to releasing updates for your app using wyBuild.
After you've gone through either the video tutorial or the step-by-step walkthrough to integrate wyUpdate and the AutomaticUpdater in your application, you'll need to know the workflow to keeping your users up-to-date.
Step 1: Create a new version
There are a few steps to releasing a new version to your users. For this example, let's assume your new version is version "1.2":
Create a folder to store the files for this new version (we're calling it 1.2):

Copy all of the files from version 1.2 of your app into this folder.
Drag all the files into wyBuild from inside this "1.2" folder you just copied.
Note: There are several different target folders within wyBuild. The one most people will use is the "Your program's folder". This folder corresponds to the folder where the "wyUpdate.exe" and "client.wyc" files are sitting on your customer's computer (i.e. in your app's base directory). This way you don't need to hard code your application paths.
Step 2: Re-build wyUpdate if you're making an installer for the new version
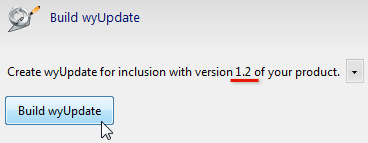
If you're going to make an installer for this version, then you'll need to re-build wyUpdate. As you'll notice this re-built version will be for inclusion with version 1.2 of your app. (Note: Don't include versions of wyUpdate.exe and client.wyc built for other versions of your app. Always rebuild wyUpdate.).
You should not include wyUpdate.exe in your updates — wyUpdate self-updates. The client.wyc file, however, can be included with your updates if you want to.
Step 3: Build your updates
Simply click the "Build updates" button and wyBuild will dynamically scan your files and build the update patches.
Step 4: Upload the updates to your server
Click the "Upload updates" button to upload your newly created update files. Now your users will be able to update to the new version of your app.
(Optional) Step 5: Build your new installer
When you're building your installer, include all of your app files and folders along with the newly re-built "wyUpdate.exe" and "client.wyc" for version 1.2 of your app.


